Unity Bluetooth Application
- Skylar Castator
- Feb 22, 2024
- 4 min read

Introduction
One of the most important steps to making Arduino devices is finding out how you can connect and control them. IoT is a huge field because of the interconnectivity between devices and making them modular for future development.
So if you followed the last blog post for Basic Autonomous Robot, we have a section for connecting the Bluetooth devices to the Arduino and show we can pass messages back and forth to devices like a phone. This tutorial will take the next step and show how to make a mobile device application that connects to a Bluetooth device. That way, in the future, we can make more interactive interfaces and use our electronic devices anywhere.
Circuit Board Review
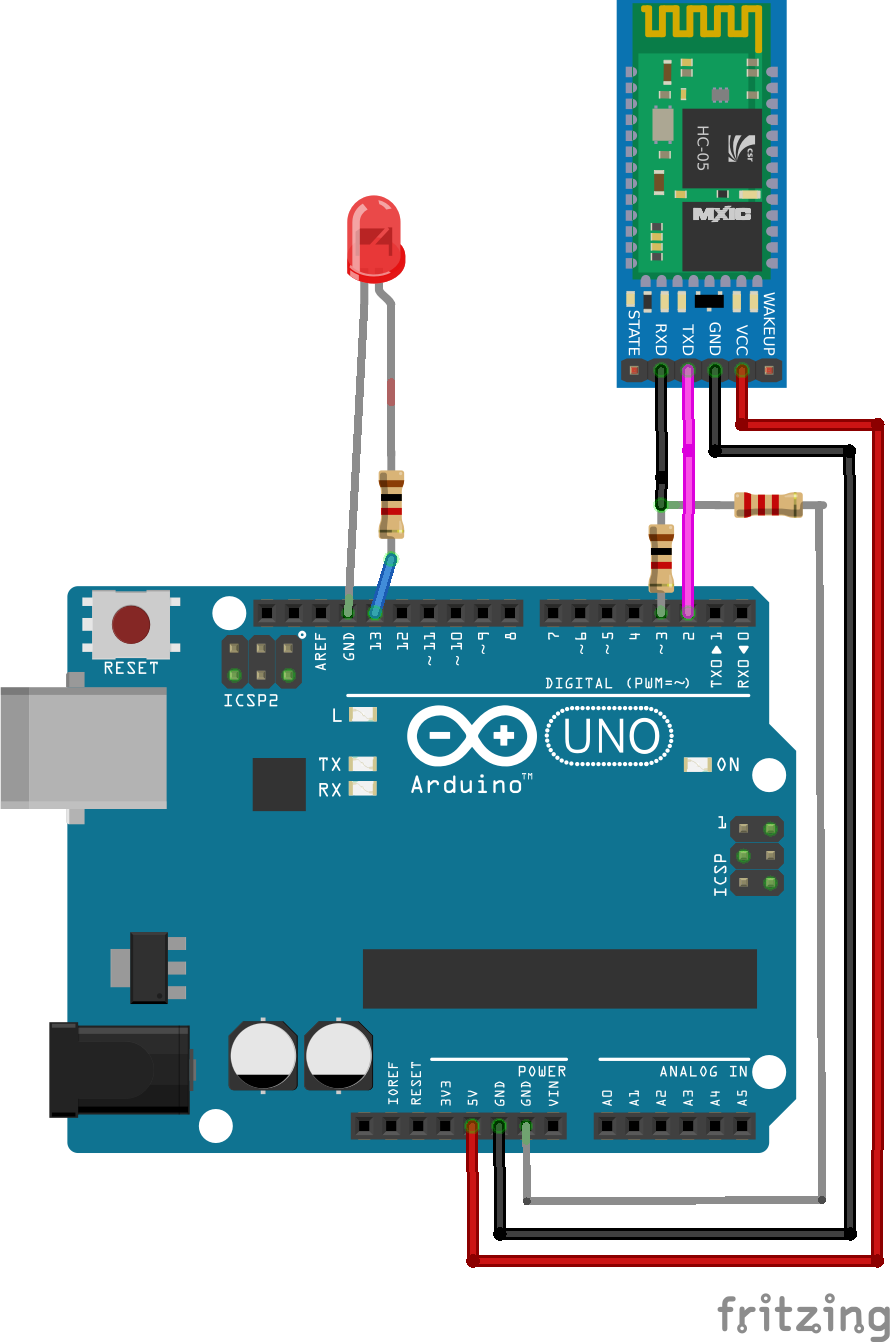
The circuit above shows an example of how a Bluetooth module can be used with Arduino. We will be using this circuit for the rest of the tutorial.
Arduino Code
The example code below connects a Bluetooth device to the Arduino reads the input and then turns on / off a LED when the string is sent with the command from the software connected to the Bluetooth device.
We first want to include the Bluetooth package and initialize the Bluetooth on the desired pins. We also want to reference the LED pin that we will be turning on and off.
The next step is to use the setup function to set the processing time on the Serial and Bluetooth device. This is important because it syncs the 2 timers so the messages are read properly.
void setup()
{
  Serial.begin(9600);
  EEBlue.begin(9600);
  Serial.println("The Bluetooth gates are open.");
  Serial.println("Connect to HC-05 with 1234 as key");
  pinMode(LEDPIN, OUTPUT);
  digitalWrite(LEDPIN,LOW);
}
With the loop function, we will wait until we have data available for the Bluetooth device and then use the EEBlue readString call to return the full content of the message. We take the message, print it to the console, and then check if it fits one of our board's commands; LED ON and LED OFF. Once we get the command send a high or low command to the LED pin and we wait for the next message.
void loop()
{
  if (EEBlue.available()){
    String command = EEBlue.readString();

    if (command .length() > 0) {
      Serial.print(command );

      if (command == "LED ON")
      {
        digitalWrite(LEDPIN,HIGH);
      }
      else if (readString == "LED OFF"){
        digitalWrite(LEDPIN,LOW);
      }
    }
  }
}
If you are having any issues with running the code, you can use the Serial Bluetooth Terminal Application and test seeing and receiving data from the connected Arduino device.

The Application
Can We Avoid Coding?
Yes, but where is the fun in that? There are applications you can find in the app store like the Arduino app Arduino Bluetooth Control. It's a simple interface to allows you to add buttons and UI to an application for prototyping. This works great if you have a very simple communication layer between the application and the device you are controlling, but once you want to have a more complex interface or application, we can dig into making our mobile application.
Bluetooth in Unity
I chose Unity because I wanted to have software that was easy to use and wasn't too complicated for newer coders. Although Android and IOS have native libraries that are good to know and will be explored later, I felt we could make the application user-friendly and it would be more accessible for future projects.
To get started, you can download my example project here.
https://github.com/SkylarCastator/unity-bluetooth-project
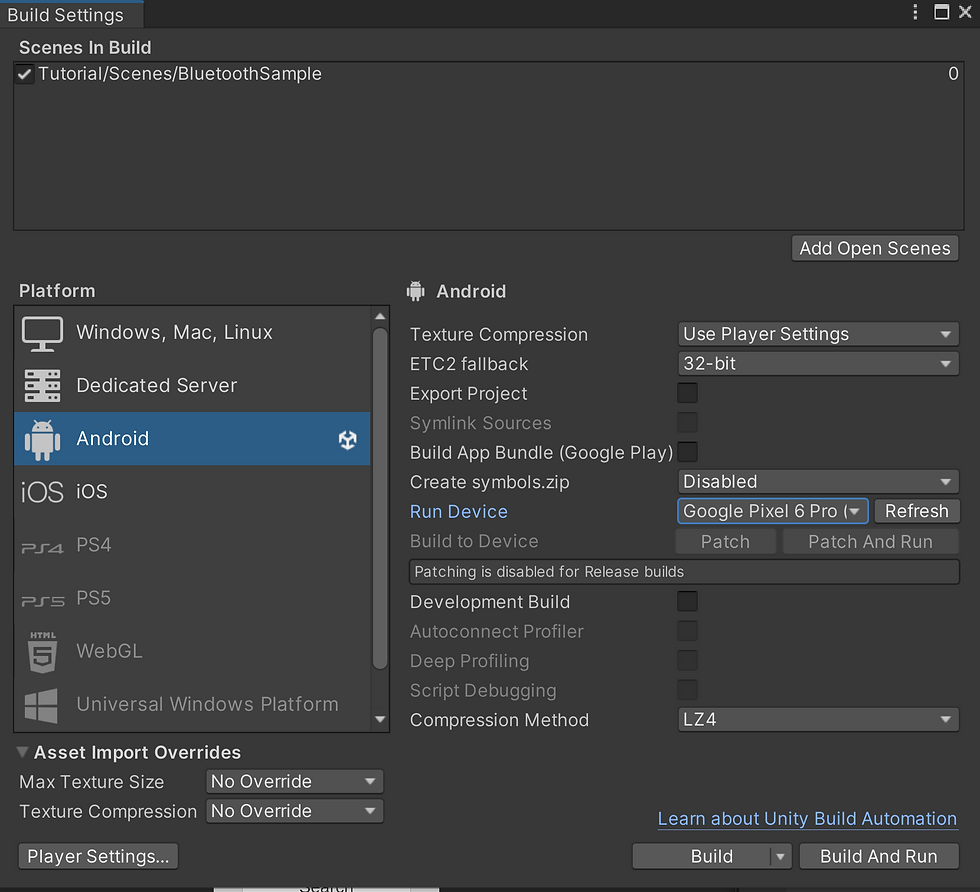
Once you pull the project, you'll want to convert the build setting to Android and make sure your Android device is enabled as a developer device. You can find the tutorial here.
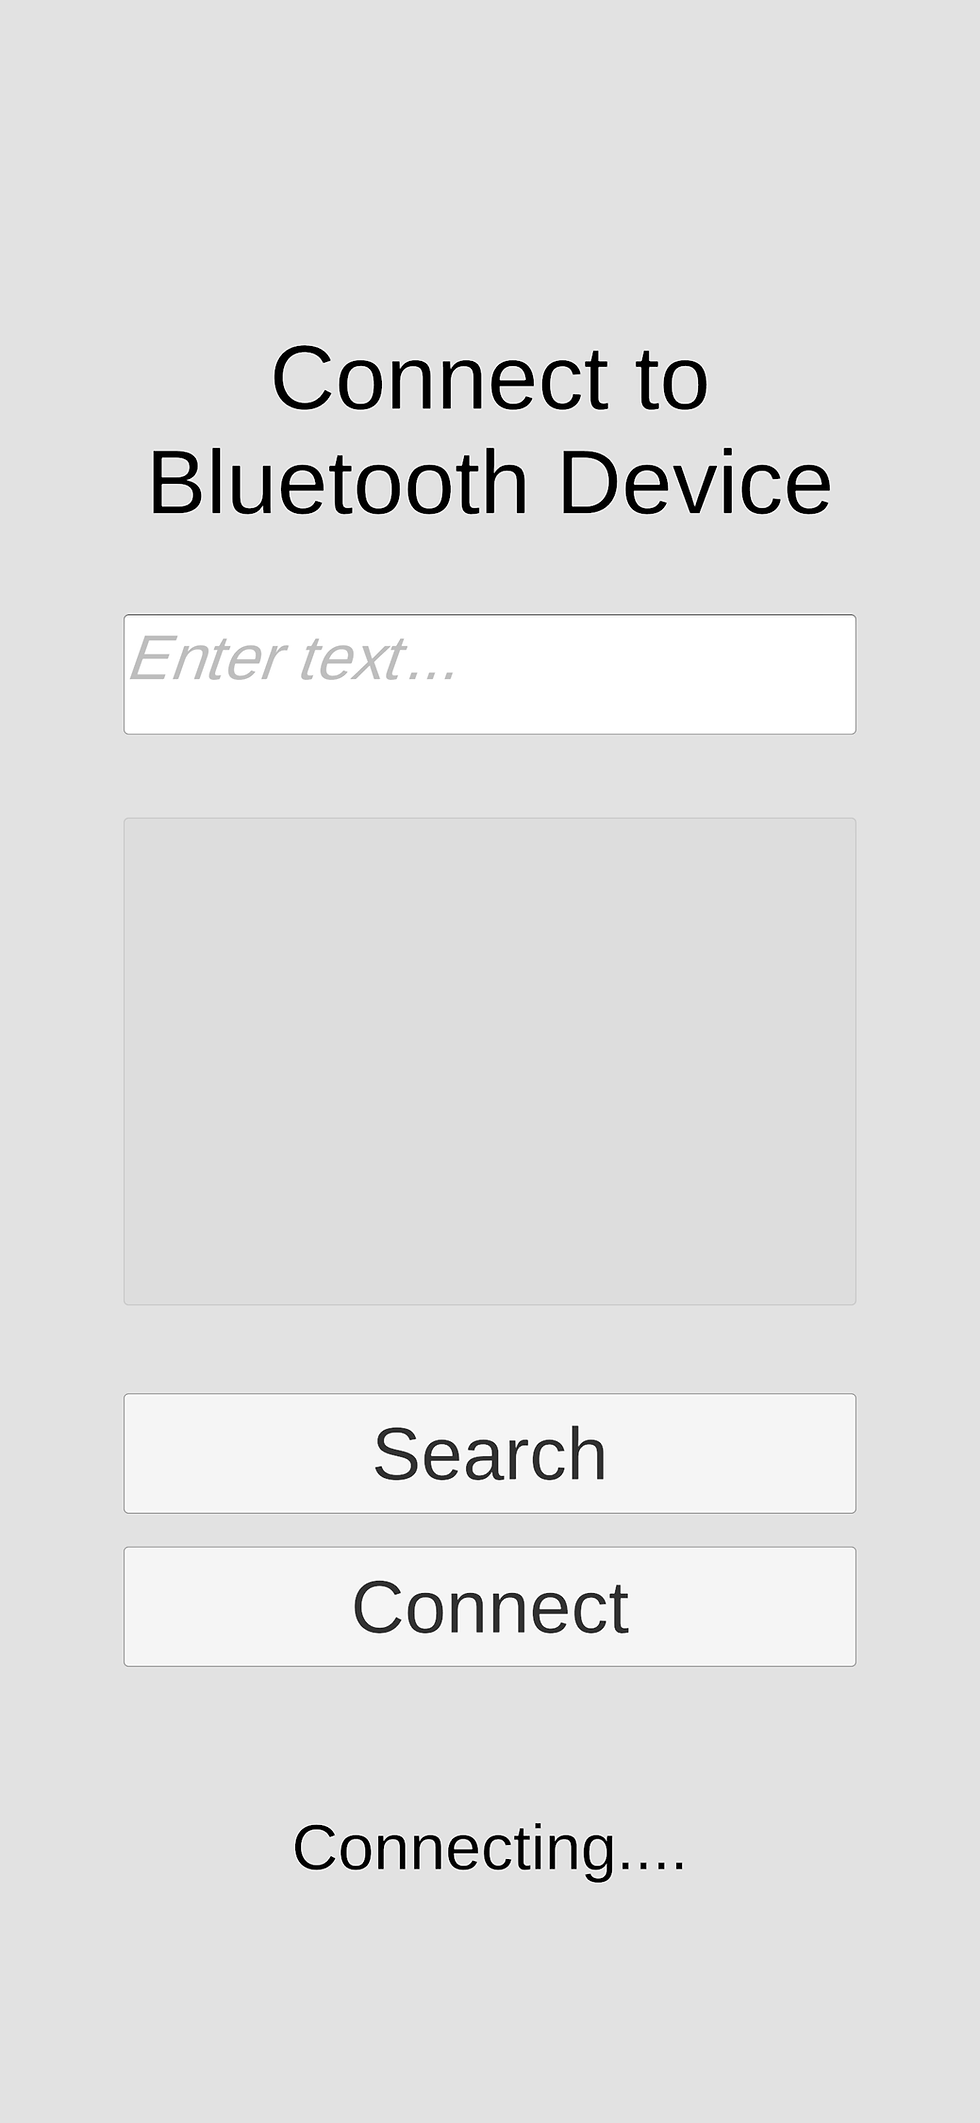
Once you can build to your Android device, you should see the window below. You can search for the device by its name or you can select the search button and it populates a scroll view with all of the available devices.
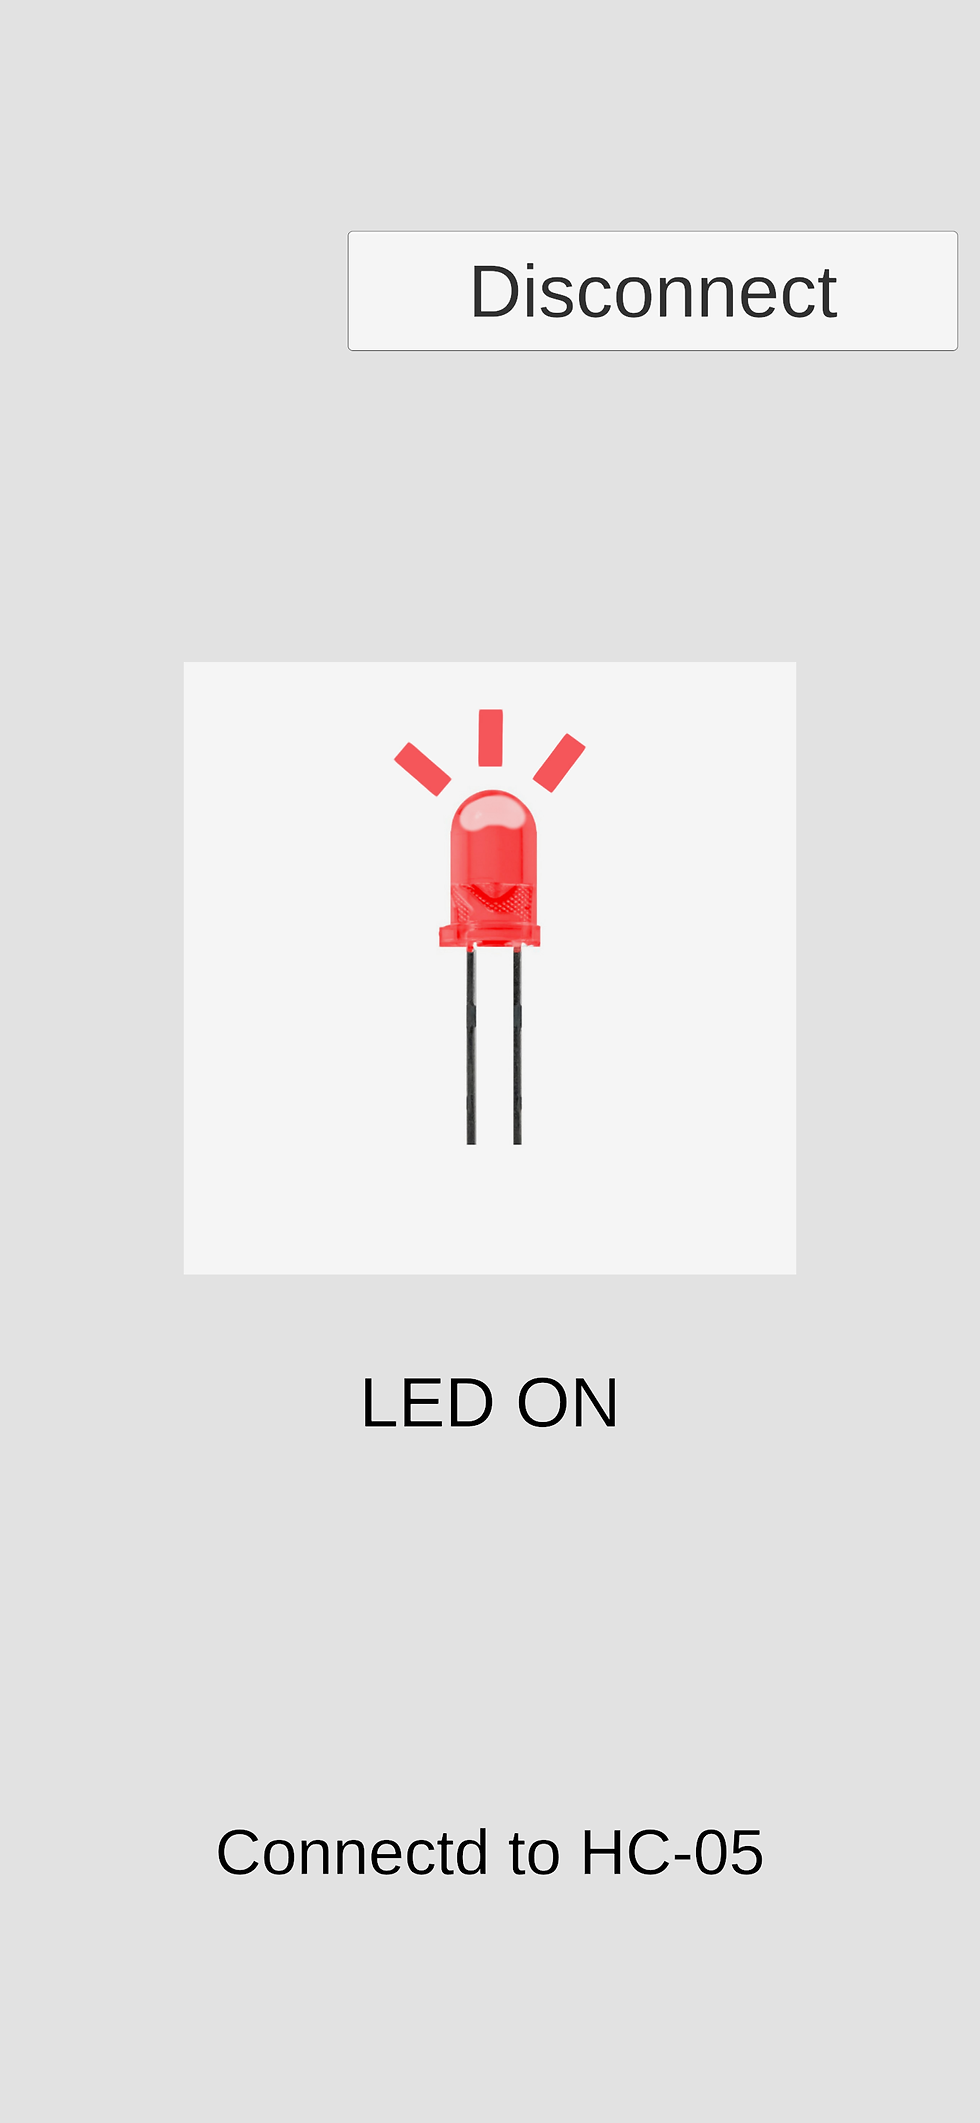
Once the device is connected you will see the window below. You can turn on and off the LED by pressing the LED image which will send the command we are expecting in the Arduino device.
Understanding the Project
In my current project, I am using this Unity package that allows the Unity build to communicate to the Android device. We will replace this in the future with our version. (Create AAR packages Coming soon) https://github.com/bentalebahmed/BlueUnity/tree/master V2 of the unity package can be downloaded directly here.
Once we imported the package I made 2 scripts. One to manage the UI and the other to manage the Bluetooth connection. BluetoothUI.cs and BluetoothController.cs. The UI script references all of the UI in the Tutorial/BluetoothSample scene. It also contains the functions the buttons hook into to run the application.

The Bluetooth controller acts as a wrapper for the package. The UI reads the data from the application interface and then links to the controller to find all the Bluetooth-specific commands. The example below is the function to send messages to the connected device and all we need to do is pass it a string.
    public void SendBluetoothMessage(string message)
    {
        if (deviceConnected && (message != "" || message != null))
            BluetoothService.WritetoBluetooth(message);
        else
            Debug.LogError("Not connected");
    }
Conclusion
This project is simple to get started making your own Bluetooth applications that can scale developing robots and other electronic projects. I plan to make some fun posts using this software soon and it's a great starting point to copy and make your own for prototyping. My next big step in this software is to replace the underlying package with my version of the software. I will also be posting tutorials on how to make this software natively on both IOS and Android as well while I make the packages so stay tuned!